MeowBlock Level 116 Answer & Solution Walkthrough
Question board, completed answer, step-by-step teaching, and video walkthrough for MeowBlock Level 116.
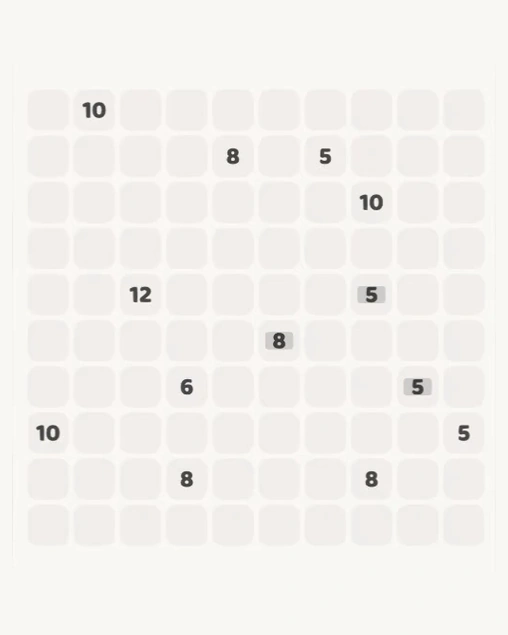
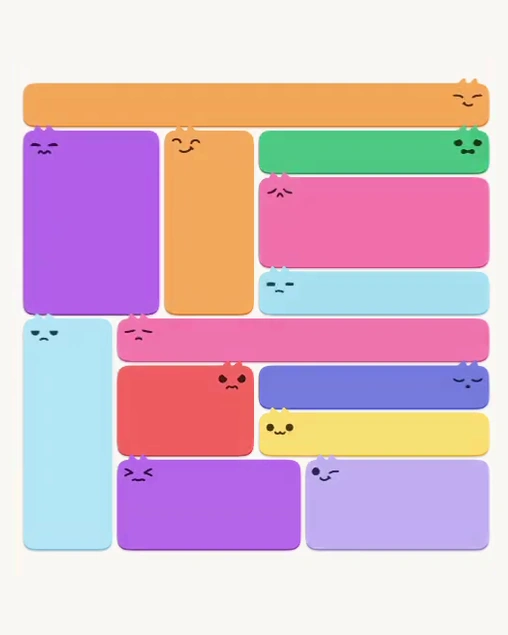
MeowBlock Level 116 answer
Level 116 uses a 10x10 grid with 100 playable cells. The completed answer contains 13 non-overlapping blocks. Use this placement summary to check the answer above before following the video-verified steps.
| Step | Cells | Position | Finished shape |
|---|---|---|---|
| 1 | 10 | upper center | 1x10 horizontal |
| 2 | 10 | lower-left area | 5x2 rectangular |
| 3 | 8 | lower center | 2x4 rectangular |
| 4 | 8 | lower-right area | 2x4 rectangular |
| 5 | 5 | lower-right area | 1x5 horizontal |
| 6 | 5 | lower-right area | 1x5 horizontal |
| 7 | 8 | middle center | 1x8 horizontal |
| 8 | 6 | lower center | 2x3 rectangular |
| 9 | 5 | middle-right area | 1x5 horizontal |
| 10 | 8 | middle center | 4x2 rectangular |
| 11 | 10 | middle-right area | 2x5 rectangular |
| 12 | 5 | upper-right area | 1x5 horizontal |
| 13 | 12 | middle-left area | 4x3 rectangular |
MeowBlock Level 116 hints and walkthrough
Place the 10-cell horizontal block at the upper center
Fill row 1 and columns 1-10 to make a 1x10 rectangle matching the completed answer. This is the only new block in this frame, so match its four grid boundaries before continuing.
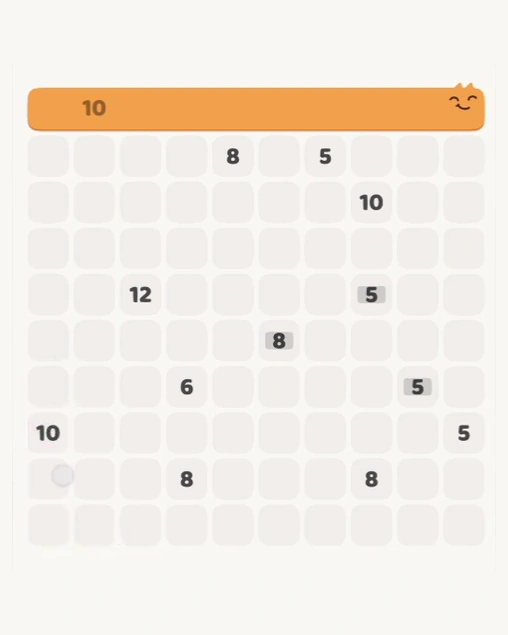
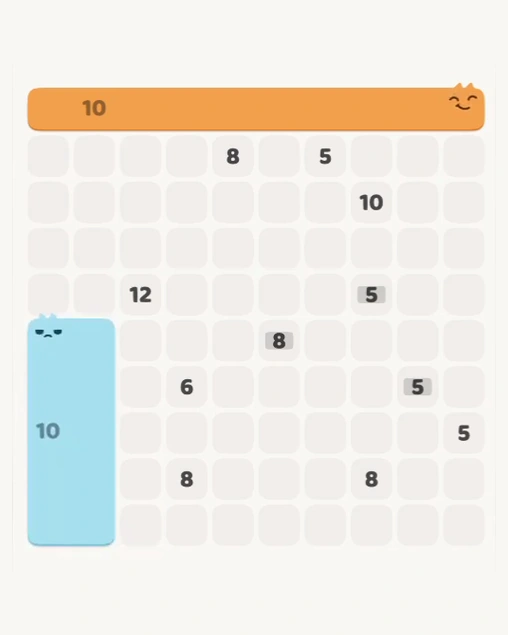
Board after step 1 Place the 10-cell rectangular block at the lower-left area
Fill rows 6-10 and columns 1-2 to make a 5x2 rectangle matching the completed answer. This is the only new block in this frame, so match its four grid boundaries before continuing.
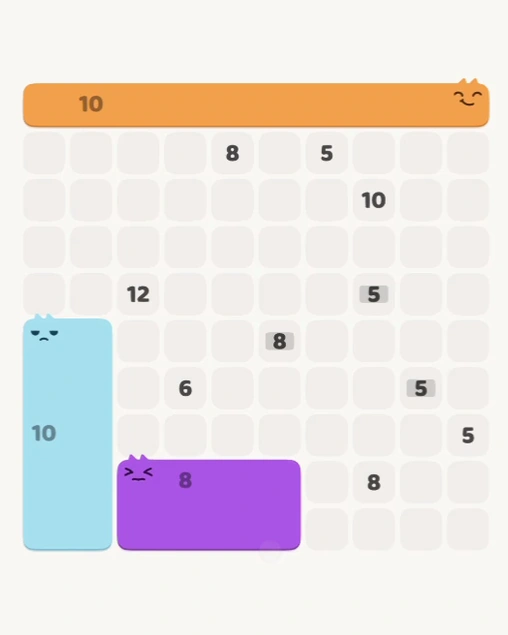
Board after step 2 Place the 8-cell rectangular block at the lower center
Fill rows 9-10 and columns 3-6 to make a 2x4 rectangle matching the completed answer. This is the only new block in this frame, so match its four grid boundaries before continuing.
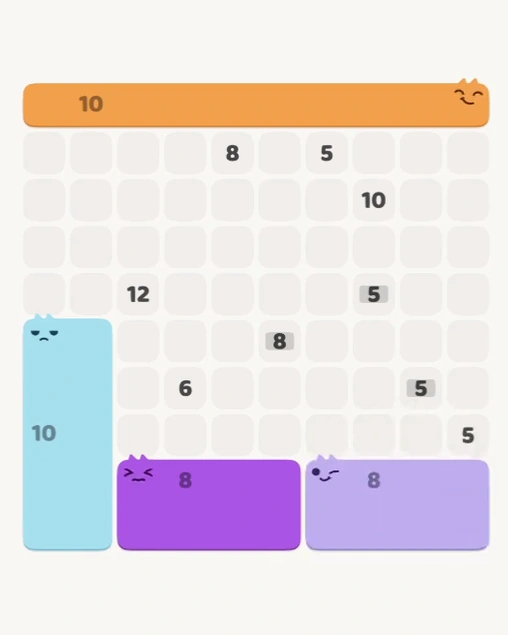
Board after step 3 Place the 8-cell rectangular block at the lower-right area
Fill rows 9-10 and columns 7-10 to make a 2x4 rectangle matching the completed answer. This is the only new block in this frame, so match its four grid boundaries before continuing.
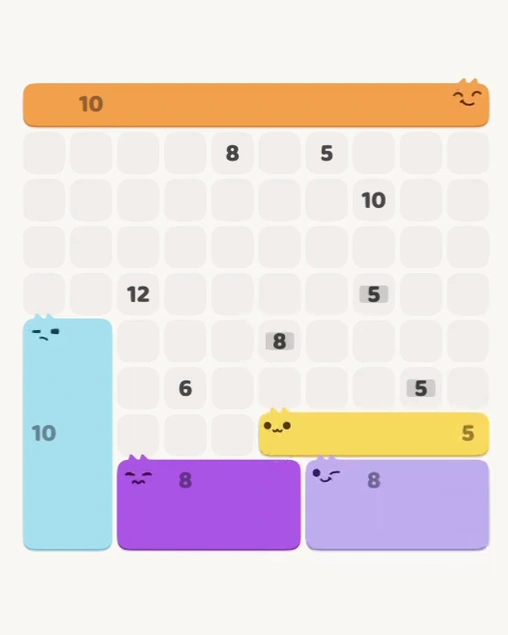
Board after step 4 Place the 5-cell horizontal block at the lower-right area
Fill row 8 and columns 6-10 to make a 1x5 rectangle matching the completed answer. This is the only new block in this frame, so match its four grid boundaries before continuing.
Board after step 5 Place the 5-cell horizontal block at the lower-right area
Fill row 7 and columns 6-10 to make a 1x5 rectangle matching the completed answer. This is the only new block in this frame, so match its four grid boundaries before continuing.
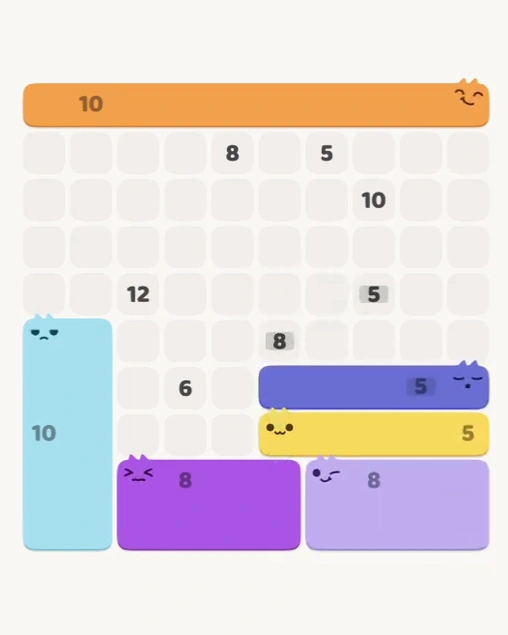
Board after step 6 Place the 8-cell horizontal block at the middle center
Fill row 6 and columns 3-10 to make a 1x8 rectangle matching the completed answer. This is the only new block in this frame, so match its four grid boundaries before continuing.
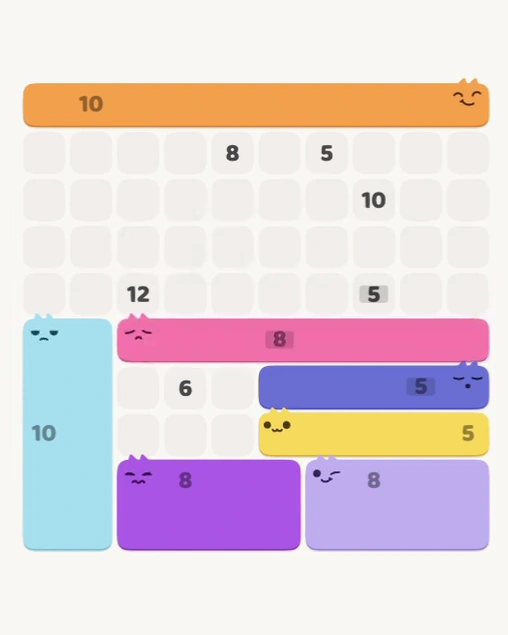
Board after step 7 Place the 6-cell rectangular block at the lower center
Fill rows 7-8 and columns 3-5 to make a 2x3 rectangle matching the completed answer. This is the only new block in this frame, so match its four grid boundaries before continuing.
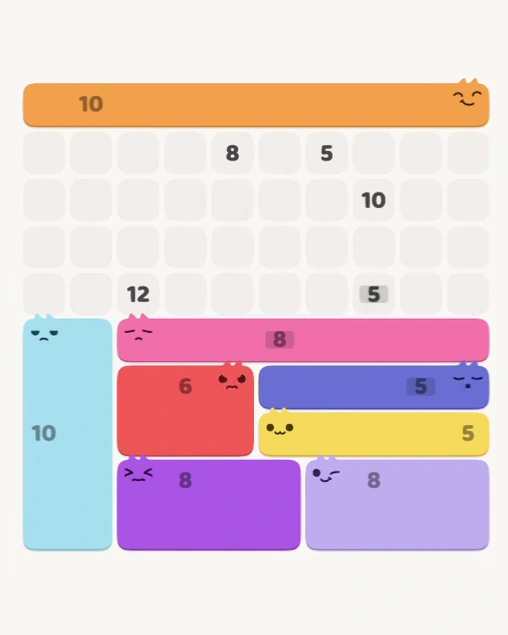
Board after step 8 Place the 5-cell horizontal block at the middle-right area
Fill row 5 and columns 6-10 to make a 1x5 rectangle matching the completed answer. This is the only new block in this frame, so match its four grid boundaries before continuing.
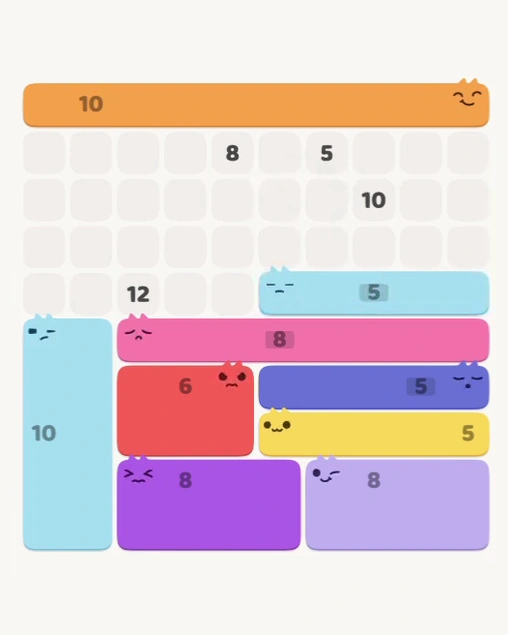
Board after step 9 Place the 8-cell rectangular block at the middle center
Fill rows 2-5 and columns 4-5 to make a 4x2 rectangle matching the completed answer. This is the only new block in this frame, so match its four grid boundaries before continuing.
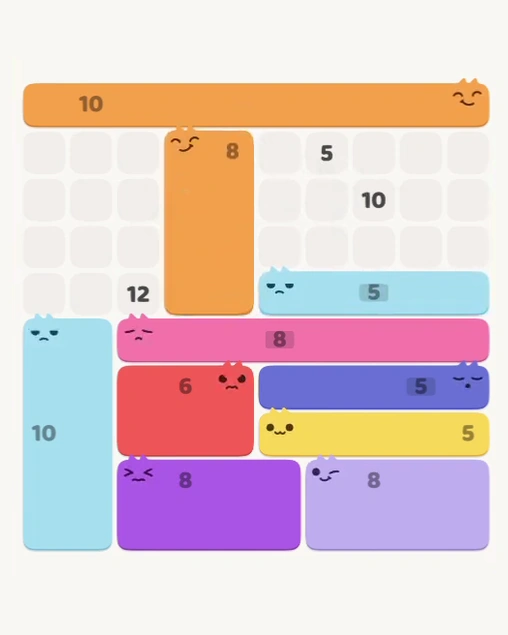
Board after step 10 Place the 10-cell rectangular block at the middle-right area
Fill rows 3-4 and columns 6-10 to make a 2x5 rectangle matching the completed answer. This is the only new block in this frame, so match its four grid boundaries before continuing.
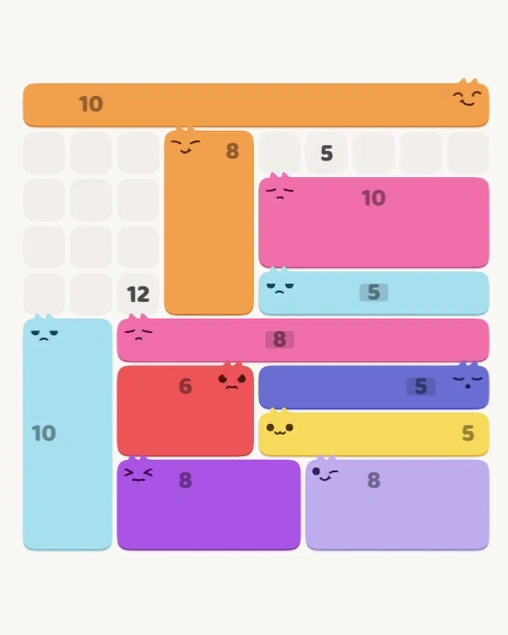
Board after step 11 Place the 5-cell horizontal block at the upper-right area
Fill row 2 and columns 6-10 to make a 1x5 rectangle matching the completed answer. This is the only new block in this frame, so match its four grid boundaries before continuing.
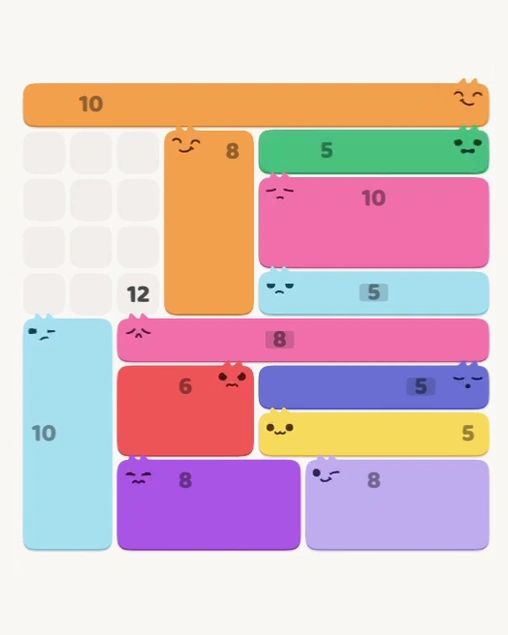
Board after step 12 Place the 12-cell rectangular block at the middle-left area
Fill rows 2-5 and columns 1-3 to make a 4x3 rectangle matching the completed answer. This is the only new block in this frame, so match its four grid boundaries before continuing.
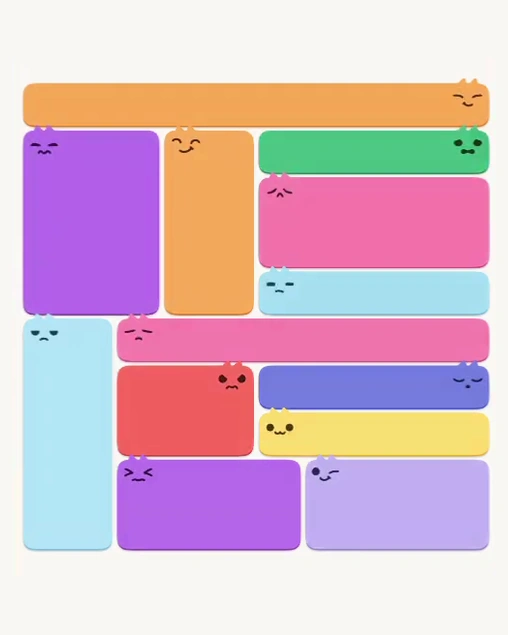
Board after step 13
Trickiest move in MeowBlock Level 116
The 12-cell block at the middle-left area occupies rows 2-5 and columns 1-3. Its finished shape is 4x3; swapping that width and height would cross one of the boundaries shown in the corresponding step image.
Use the screenshot for that step as the exact checkpoint. Confirm the block matches the shown boundary, remains rectangular, and does not absorb another numbered cell before moving to the next placement.
Common mistakes
- Do not count a dragged block as finished until it settles and its cat head appears.
- Keep the 12-cell block at the middle-left area within its exact 4x3 boundary.
- Do not copy colors alone. Match the occupied rows and columns shown in each step image.
- If a later rectangle no longer fits, undo the first placement whose boundary differs from the walkthrough screenshot.
Final check
The final move fills rows 2-5 and columns 1-3 with a 4x3 rectangle matching the completed answer. After it settles, all 100 playable cells are covered exactly once and every block matches the completed answer image.